
Tuesday, 19 May 2015

Monday, 18 May 2015
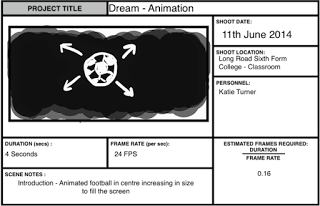


P3. Screenshot of Edit and Evaluation

Mist Effect
Here I have used a misty effect to give the feeling of Katie drifting off into a day dream. I did this by downloading it off YouTube and putting the clip partially over the clip of Katie looking out the window and the first animation clip, I then faded it in and the faded it out so you can see the mist over Katie's face.

Reversed
To be more creative with the effects in the animation, we reversed this shot, making it more interesting (for the viewers especially) and to show experimentation with editing our shots. We did this by clicking on 'Clip' in the tool bar, then going on 'Speed/Duration' and ticking 'Reverse Speed'.

Slow-Motion
For this clip I slowed it down to show a build up to Katie shooting. As she kicks the ball it then speeds up to fit with the rest of the clips which have a faster pace. I did this by clicking on 'Clip' in the tool bar, then going on 'Speed/Duration' and then changing the speed percentage.

P3. Rough Cut and Review
Peer Review:
- The introduction is too long - shots could be cut down a lot to make more room to add extra animation
- Ambient sound should be added for the beginning part where she is taking the exam and at the end - rustling of paper, a clock ticking and people talking quietly
- Needs more animation to bulk up the video and make the majority of it animation, compared to currently how it's about two thirds animation to a third footage
- There is a glitch at 30 seconds that needs to be fixed
- The music is effective when it comes in during the animation and then fades out again as the animation finishes
- A variety of effects could be added to the animation, for example some slow motion shots, reversed shots, sped up shots and so on
Looking at the review, we know that it's important to add more animation and to make the clips more creative by adding a variety of effects. This will make sure the animation won't get boring for the viewer as we will add at least an extra minute of animation for our final cut.
Sunday, 24 August 2014

Friday, 22 August 2014
Thursday, 21 August 2014

Thursday, 10 July 2014
P3. Updates
Where am I up to with my animation?
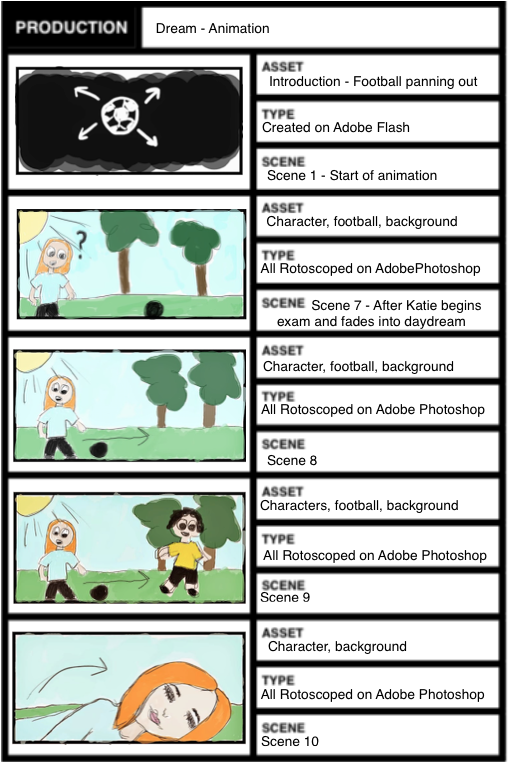
The Animation Product Documentation also needs to be completed and uploaded. Because our animation is a rotoscope, we do not need to complete the asset sheet because we did not create any 'assets' for our project; as our animation is made out of clips that we've filmed.
We are at the final stages of creating our animation. Most of our clips have been rotoscoped and edited together, and we only have around 10 seconds of animation left to complete to reach our target of 2 minutes. We have added in the 'dream' effect into Premier Pro, and we have only got to add in some music and a voice over before we complete our animation.
The Animation Product Documentation also needs to be completed and uploaded. Because our animation is a rotoscope, we do not need to complete the asset sheet because we did not create any 'assets' for our project; as our animation is made out of clips that we've filmed.
The Call Sheet for Filming is completed and is in my folder, ready to scan in and put on our blogs, but we can do that when we're back in College after Summer. The only documentation that needs completing now is the Shot Log sheets.
Friday, 20 June 2014
P3. Process and Equipment Set Up
Equipment Set-Up:
This is how I animate our project. I use a small Wacom tablet and a Macbook Pro, and I rotoscope the film clips on Photoshop, one frame at a time. This is a suitable set-up for creating our animation because it's easy to sit at my desk and rotoscope with my Wacom tablet and you can see what I'm animating in front of me and the mouse is in easy access to change frames and zoom in/out.

Process:
- Go onto Photoshop
- File - Import - Video Frames to Layers
- Choose a video clip to animate and cut down the clip to make sure you don't animate hundreds of frames
- Make a new frame above every film clip frame on the right hand side, and this is what you will draw on to trace the film clip below, making an animated version of the film clip once this has been done for all of the frames
- Using the Wacom tablet, draw over each film clip with your brush tool, making sure you don't draw straight onto the film clip because you'll need to hide that later
- Once you've drawn each frame, click on the eye of each film clip frame, leaving only your rotoscoped frames
- Add in a background for each clip by changing the background colour
- Change each frame rate to 0.08 seconds and play your animation to see if it is fast/slow enough and adjust accordingly.


Tuesday, 10 June 2014
Monday, 2 June 2014
P3. Animation Product Idea
Inspiration
The inspiration for our project is the World Cup 2014 in Rio, and we're going to tell a story of a girl with an aspiration to be a football player, and she has to watch other guys play it outside whilst she's inside and sitting an exam that she doesn't want to do.
How are you going to do this?
We're going to do this by recording film clips for our two minute sequence, for example of Katie dribbling the ball and scoring a goal, and upload them as layers on Photoshop so we can rotoscope them and create lots of short, animated gifs that we can put together on Premier Pro. Also, we're going to add a cloud effect for when Katie falls asleep and begins dreaming of playing football, which we'll create on After Effects. When we cut together the final animation, we will add filters, sound and a voice-over on Premier Pro too. Overall the animation is expected to be about two minutes long.
The inspiration for our project is the World Cup 2014 in Rio, and we're going to tell a story of a girl with an aspiration to be a football player, and she has to watch other guys play it outside whilst she's inside and sitting an exam that she doesn't want to do.
How are you going to do this?
We're going to do this by recording film clips for our two minute sequence, for example of Katie dribbling the ball and scoring a goal, and upload them as layers on Photoshop so we can rotoscope them and create lots of short, animated gifs that we can put together on Premier Pro. Also, we're going to add a cloud effect for when Katie falls asleep and begins dreaming of playing football, which we'll create on After Effects. When we cut together the final animation, we will add filters, sound and a voice-over on Premier Pro too. Overall the animation is expected to be about two minutes long.
Friday, 16 May 2014


Thursday, 15 May 2014
P3. Practise Rotoscope GIF

I wanted to experiment with a sketchy-styled rotoscope to see how it turned out. I liked the simplistic look of the black and white because it contrasts with the realistic and colourful footage that I traced over. Overall I think that this technique with only a black pen is too simple to use in my final animation, so I can add some colour so make it more interesting.
Monday, 12 May 2014
P3. Planning for Animation
1. Inspiration
Our inspiration for our idea has come from the film 'All Stars' this is because there is a part where Jaden is in an exam and he begins to drift off, he goes into this Paper Samurai world where he dances and defeats the samurai's.
2. How are you going to do this
We are going to do this by recording Katie doing an exam, then her looking outside where a group of boys are playing football, then a view down to her bag where he football is. We will use after effects to show her drifting off into a 'dream' which she will be playing football with a group of boys and beating them, this will be rotoscoped in photoshop.
3. Who with
Katie Turner - http://katieturneranimation.blogspot.co.uk
4. What is it going to look like
Rotoscoped footage of Katie defeating a load of boys at football.
5. Structure
It will begin with Katie sat in a classroom about to begin an exam, as she sits through a bit of it, she notices boys playing football outside, she then looks down at her football/trainers in her bag. She then drifts into a dream of her playing football with the boys and she beats them. In the dream, it will be rotoscoped and Katie will be most detailed, the others will be a bit scribbly. She wakes up at the end of the test.
6. Form
Rotoscope of football footage.
7. Animation type
A mix between a detailed and sketchy rotoscope on Photoshop and occasionally After Effects.
8. Selection of genre of style
Abstract animation short - sports/football based.
9. Storyline
The story will begin with Katie sat in an exam which is not really of any interest to her. As she begins the exam she notices boys playing football outside and begins to feel a bit jealous so she looks down at her bag where a football and her trainers are. She then drifts off into a dream which she imagines herself playing football against the boys and beating them all. She drifts back when the exam is finished.
Inspiration
https://www.youtube.com/watch?v=cRZMjHzWXQc - This is a rotoscoped animation of a football match, all of the players are sketchy, for example in the background, except for Gareth Bale to show that he is the main focus of the animation.
https://www.youtube.com/watch?v=Di7G4nbpyDg - This is a basic video of tricks between two players, which is an example of the kind of footage we will be filming.
https://www.youtube.com/watch?v=n0FOPTYJPXw - This music video incorporates various rotoscoping styles. This idea could be a potential for use because it shows creativity as the rotoscoping is on the people's t-shirts, and it can help us use more that one different style of rotoscoping.
https://www.youtube.com/watch?v=gHKZ6x6vXXY - This FIFA '14 edit shows a few different and interesting edits that we can create in After Effects and include in our rotoscope, this could change it up slightly so it isn't boring.
Our inspiration for our idea has come from the film 'All Stars' this is because there is a part where Jaden is in an exam and he begins to drift off, he goes into this Paper Samurai world where he dances and defeats the samurai's.
2. How are you going to do this
We are going to do this by recording Katie doing an exam, then her looking outside where a group of boys are playing football, then a view down to her bag where he football is. We will use after effects to show her drifting off into a 'dream' which she will be playing football with a group of boys and beating them, this will be rotoscoped in photoshop.
3. Who with
Katie Turner - http://katieturneranimation.blogspot.co.uk
4. What is it going to look like
Rotoscoped footage of Katie defeating a load of boys at football.
5. Structure
It will begin with Katie sat in a classroom about to begin an exam, as she sits through a bit of it, she notices boys playing football outside, she then looks down at her football/trainers in her bag. She then drifts into a dream of her playing football with the boys and she beats them. In the dream, it will be rotoscoped and Katie will be most detailed, the others will be a bit scribbly. She wakes up at the end of the test.
6. Form
Rotoscope of football footage.
7. Animation type
A mix between a detailed and sketchy rotoscope on Photoshop and occasionally After Effects.
8. Selection of genre of style
Abstract animation short - sports/football based.
9. Storyline
The story will begin with Katie sat in an exam which is not really of any interest to her. As she begins the exam she notices boys playing football outside and begins to feel a bit jealous so she looks down at her bag where a football and her trainers are. She then drifts off into a dream which she imagines herself playing football against the boys and beating them all. She drifts back when the exam is finished.
Inspiration
https://www.youtube.com/watch?v=cRZMjHzWXQc - This is a rotoscoped animation of a football match, all of the players are sketchy, for example in the background, except for Gareth Bale to show that he is the main focus of the animation.
https://www.youtube.com/watch?v=Di7G4nbpyDg - This is a basic video of tricks between two players, which is an example of the kind of footage we will be filming.
https://www.youtube.com/watch?v=n0FOPTYJPXw - This music video incorporates various rotoscoping styles. This idea could be a potential for use because it shows creativity as the rotoscoping is on the people's t-shirts, and it can help us use more that one different style of rotoscoping.
https://www.youtube.com/watch?v=gHKZ6x6vXXY - This FIFA '14 edit shows a few different and interesting edits that we can create in After Effects and include in our rotoscope, this could change it up slightly so it isn't boring.
Tuesday, 6 May 2014
Friday, 2 May 2014

Thursday, 1 May 2014


P3. Practise Flash Gif

However when that was completed the sequence moved too quickly, so I had to ctrl + click on each frame and choose 'insert frame' to make them longer. Once that was solved, I created a new layer and drew a ball with the circle tool and inserted it in my sequence at the right side of the page. I then used ctrl + click and chose 'motion tween', and then clicked on the last frame. I clicked and dragged the ball to the other side of the page, and when I played it it looks like the man jumping over the ball.
Subscribe to:
Posts (Atom)